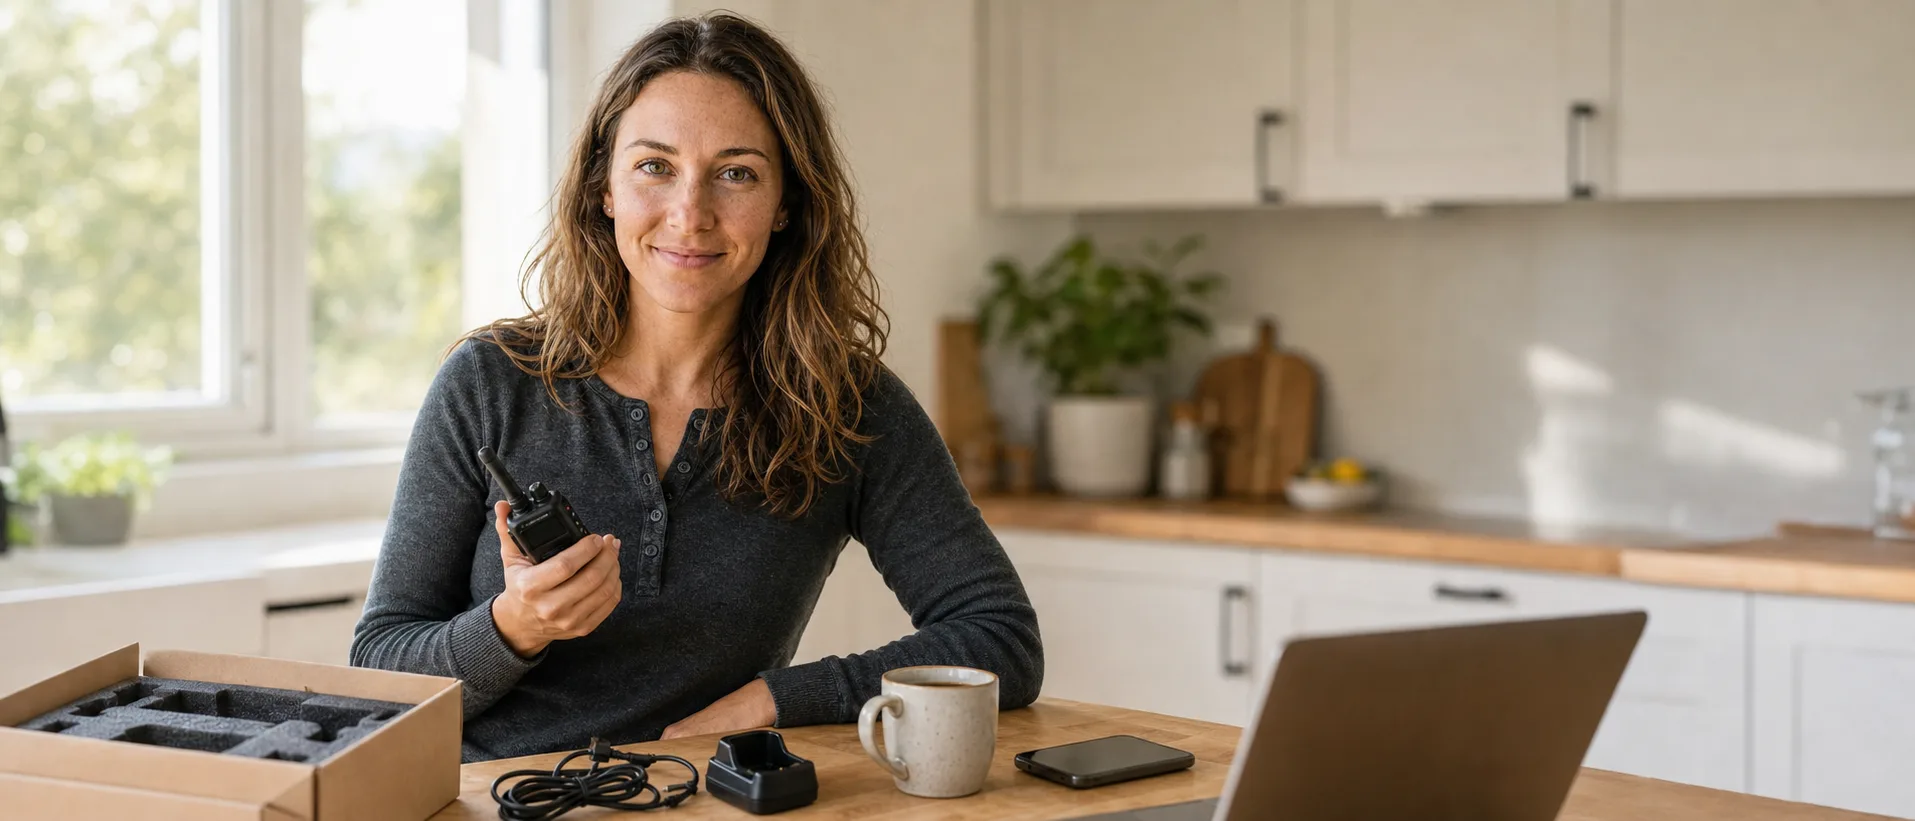

Your Technician license is on its way (or it just arrived in the FCC ULS), and the radio you ordered is sitting on the kitchen counter in a box you have not opened yet. Good news: from this point to your first contact on a local repeater is about ninety minutes of work, most of it waiting for a battery to charge.
This guide walks through every step. It assumes you bought a handheld (an HT, in the lingo), you have a programming cable, and you are running Windows, macOS, or Linux. If you have not picked a radio yet, the Baofeng UV-5R at $17.16 is what most new hams start with, and our best beginner radios page has the full short list. If you have not tested yet, start with our how to get your ham radio license guide and come back.
Everything else, you can do tonight.
What You Need Before You Start
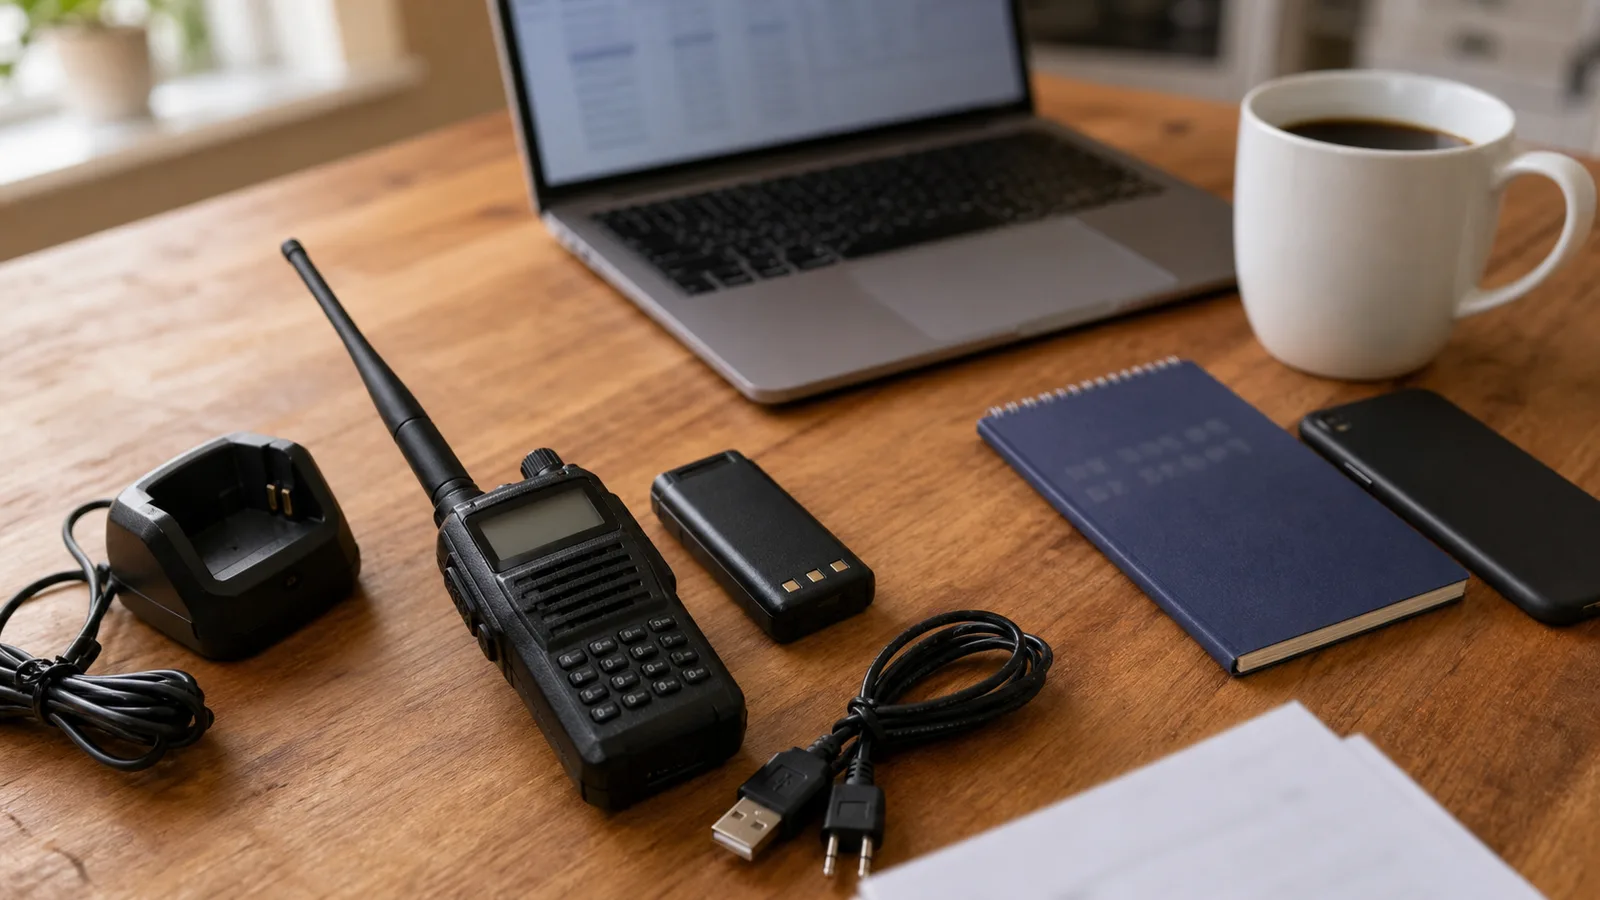
Lay this out on a table before you do anything else. You want to know what you have and what you are missing before you start unscrewing batteries.
Required:
- The radio (handheld of your choice).
- The battery (almost always in the box).
- The charger (usually included, sometimes a wall wart, sometimes a desk dock).
- A stock antenna (in the box).
- A USB programming cable for your specific radio. About $5 to $15. Buy the one that matches your radio's connector. For Baofeng-style two-pin connectors, get a genuine FTDI or Silicon Labs cable. The Prolific PL2303 clones are the single biggest source of CHIRP misery on the internet.
- A computer with internet access.
- Your FCC call sign. The FCC emails this within 7 to 14 business days after your VEC submits your test session, and it shows up at wireless2.fcc.gov/UlsApp/UlsSearch.
- A list of local repeaters (we will get this in step four).
Optional but recommended:
- An upgraded antenna. The stock antennas on cheap radios are tuned for the cost target, not for performance. A Nagoya NA-771 at $20.98 is the upgrade most new hams make first.
- A speaker mic or headset. Not required for your first contact, but useful later.
Time budget: about 90 minutes start to finish. Most of that is the battery charging. You can do the programming work in parallel.
If you are still figuring out whether you need a radio that does VHF, UHF, or both, our VHF vs UHF guide covers the practical differences. For your first repeater contacts, you want a dual-band radio: VHF (the 2-meter band) for most local repeaters, UHF (the 70-centimeter band) for the rest. Every radio I link to in this article is dual-band.
Step 1: Unbox and Inspect
Open the box. You should find the radio, the battery (sometimes pre-installed, sometimes loose), the charger (and a wall adapter), the stock antenna, a belt clip, a hand strap, and a small manual.
Look the radio over. Check the screen for cracks. Check the antenna threads for damage. Check the battery contacts for bent pins. Damage is rare on radios out of the box, but it does happen, and it is much easier to return a damaged unit on day one than after you have programmed it.
Identify five things on the chassis:
- The antenna connector at the top (it screws on; do not force it).
- The PTT button on the left side (push-to-talk; this is the big one).
- The side keys below or above the PTT (programmable; we will ignore for now).
- The speaker grille and mic hole on the front (do not block these when you transmit).
- The programming jack under a rubber cover, usually a two-pin or three-pin port near the speaker. This is where your USB cable goes.
Then look at the back of the radio for the model and FCC ID sticker. Take a photo. If you ever need to look up the radio in CHIRP or check its FCC grant, you will want that sticker handy. We track FCC grant data on every product page if you want to verify what your radio is actually authorized to transmit on.
Power the radio on briefly to confirm it works (most have a knob on top that doubles as power and volume). You will see the display light up and probably some default frequency. Power it back off. We will program it first, then turn it on for real.
Step 2: Charge the Battery
Plug the charger into the wall. Slide the battery into the charger cradle (or insert the radio with the battery attached, depending on your model). The indicator light should change color. On most Baofeng-style chargers, red means charging, green means done. On some chargers, the light is solid orange while charging and turns green when full. Check your manual.
Charging time is two to four hours for most modern lithium-ion battery packs. You do not have to wait for a full charge to start programming. The radio works fine on USB power for short periods, and the battery only needs to be alive enough to confirm that programming worked.
Modern radios use protected lithium-ion cells with built-in overcharge protection, so leaving one charging overnight is not the fire hazard it would have been twenty years ago. That said, do not leave a charging radio sitting on bedding, on a cluttered desk, or somewhere it could get knocked over. Charge on a hard, flat, non-flammable surface.
Step 3: Download and Install CHIRP
While the battery is charging, install CHIRP on your computer. CHIRP is free, open-source software that connects to your radio over the programming cable and lets you edit channel memory from a spreadsheet-style interface. It supports over 1,000 radio models. If you have a budget handheld, it almost certainly works with CHIRP.
Go to chirpmyradio.com and download the latest CHIRP-next build for your operating system. CHIRP versions itself by build date, so the file name will look something like chirp-20260520.dmg or chirp-20260520-installer.exe. Install it like any other application. On macOS, the first launch will prompt a Gatekeeper warning; right-click the app and choose Open to allow it.
If you are programming a DMR radio (an AnyTone AT-D878UVII Plus, for example), CHIRP will only handle the analog FM side. For DMR talkgroups, time slots, and color codes you need the manufacturer's CPS software, and our DMR overview explains why. For an analog-only first repeater contact, CHIRP is all you need.
If you want a step-by-step walkthrough specifically for the UV-5R, our how to program a Baofeng with CHIRP article goes deeper than this section does. Come back when you are done.
Step 4: Get a Repeater List and Program It
This is the step that turns a radio with a blank channel list into a radio that can actually talk to anyone. You need to know which repeaters exist in your area, on what frequencies, with what offset, and with what tone.
Where to find local repeaters:
- RepeaterBook.com is the standard. Free, crowd-maintained, accurate ninety percent of the time. Search by ZIP code and band.
- The ARRL Repeater Directory is the official source, US-focused, and updated annually. Print or app.
- Your local ham club's website almost always lists their repeaters, their net schedules, and any tone or access notes that RepeaterBook does not capture. This is the best source for the repeaters you will actually use.
A search like "Denver ham radio repeaters" will turn up the local club inside the first three results.
What you need for each repeater:
- Output frequency. What you tune your radio to. A 2-meter repeater might be on 146.940 MHz.
- Offset. How much higher or lower the repeater listens than where it transmits. On 2-meter, the standard offset is 600 kHz. On 70-centimeter, it is 5 MHz. The sign (positive or negative) varies by frequency.
- Tone. Most repeaters require a sub-audible CTCSS tone (also called PL) to open them. Common values are 88.5, 100.0, 123.0, 146.2 Hz.
- Mode. For a first contact, you want analog FM. Some repeaters are digital (DMR, D-STAR, System Fusion) and your radio may not be able to use them. Look for "FM" or "analog" in the listing.
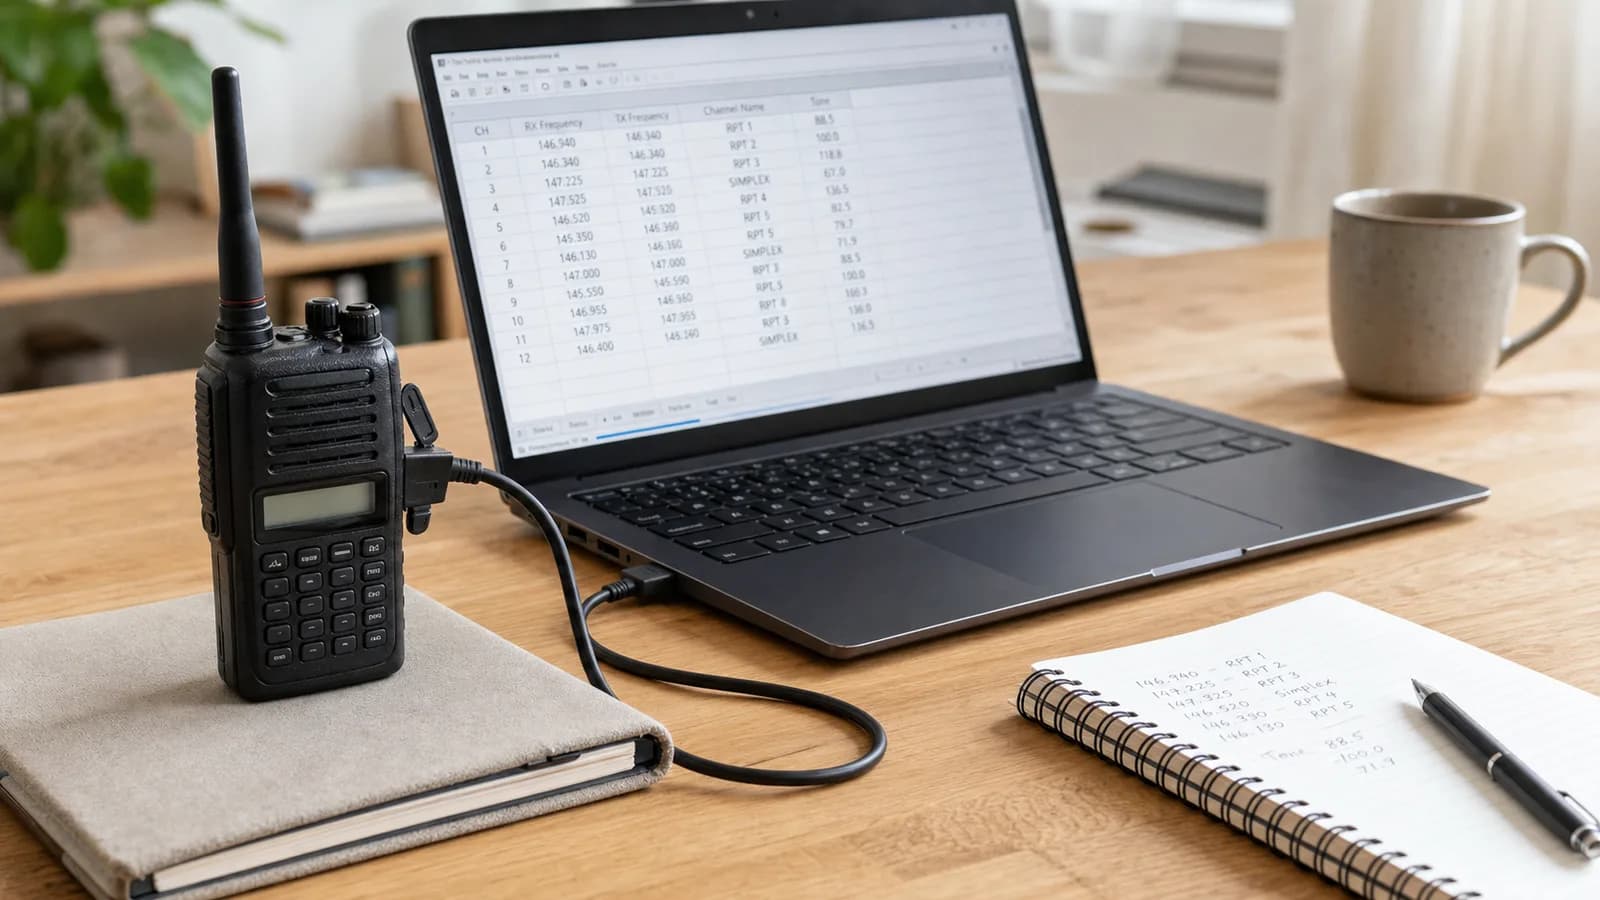
Import to CHIRP the easy way: open CHIRP, go to Radio → Import From Data Source → RepeaterBook, choose Proximity Query, enter your ZIP code and a radius (start with 25 miles). CHIRP downloads every repeater within range and drops them into your channel table with the frequency, offset, tone, and call sign already filled in. The whole step is two clicks and a thirty-second download.
Once they are imported, do three things:
- Rename channels. "WA0XYZ 146.94" is more useful than "Repeater #4."
- Reorder. Put the repeaters you will actually use in the first ten channel slots. Most radios let you scroll through channels by hardware buttons, and you do not want to scroll past fifty entries to find the one you use every night.
- Delete what you will not use. Repeaters more than 50 miles away are unlikely to be reachable from a handheld at five watts.
Upload to the radio:
- Connect the programming cable. Open the rubber port cover on your radio and seat the cable firmly. You should feel a click.
- Power the radio on.
- In CHIRP, Radio → Upload To Radio. Select your radio model and the correct COM port (or
/dev/tty.usbserialon macOS). - Wait. The progress bar takes thirty seconds to two minutes depending on the radio.
- Save the CHIRP file (
File → Save As) somewhere you will find it later. Name it something likeUV5R-Denver-2026-05.chirp. This is your backup. If you ever reset the radio or buy a second one, you can reload your channel list from this file in under a minute.
If you get "Error communicating with radio", it is almost always the cable. Reseat both ends. Try a different USB port (one directly on your computer, not through a hub). On Windows, check Device Manager and confirm the cable shows up under Ports without a yellow warning triangle. If you bought a no-name PL2303 cable for $3 from a marketplace seller, the chip is probably a counterfeit and the current driver refuses to talk to it. Buy an FTDI cable instead.
Step 5: Turn On and Find Your Repeaters
Disconnect the programming cable. Replace the rubber port cover (it keeps moisture out). Power the radio on.
You will see the display light up showing the first channel in your list. If your radio has a memory channel mode and a frequency mode (most do), make sure you are in memory mode. On the UV-5R, the VFO/MR button toggles between them; you want MR.
Identify your repeaters. Scroll through the channels you imported. Find the one closest to you, the one your local club uses most, or the one with the largest output coverage area. Write down the channel number on a sticky note (Channel 3 = WA0XYZ 146.940, for example).
Listen. Set the radio to that channel. Turn up the volume slowly; receiver feedback can be sharp if it is on full. Let the radio sit on that channel for at least five to ten minutes. You will hear one of three things:
- Conversations. Two or more hams talking back and forth, with a short courtesy beep or tail between transmissions. This is what you want. The repeater is active.
- Silence with occasional squelch chirps. The repeater is alive but no one is talking right now. Try again at a more active time (early evening on a weekday is usually busiest).
- Nothing at all. The repeater might be off the air, your radio's tone might be wrong, or you are out of range. Try a different repeater.
Confirm the radio is set to receive only at first. The PTT button on the left side of the radio is what makes it transmit. Tap it lightly. The radio should not transmit (no "TX" indicator on the display) unless you hold it down firmly for a moment. Get a feel for the button before your first transmission. You do not want to accidentally key up while you are still figuring out etiquette.
Spend at least fifteen minutes just listening on an active repeater before you transmit. You will pick up the rhythm faster than you think: who calls first, how people identify, how long transmissions last, the courtesy tone that says "your turn." This is the single biggest confidence builder, and it costs you nothing.
Step 6 (Optional): Upgrade Your Antenna
The stock antenna on most budget handhelds is a compromise between size, cost, and "good enough to pass certification." On the Baofeng UV-5R, the stock duck antenna is fine for hitting a strong repeater two miles away. For anything farther, a longer antenna with better gain meaningfully extends your range, sometimes by twenty to thirty percent.
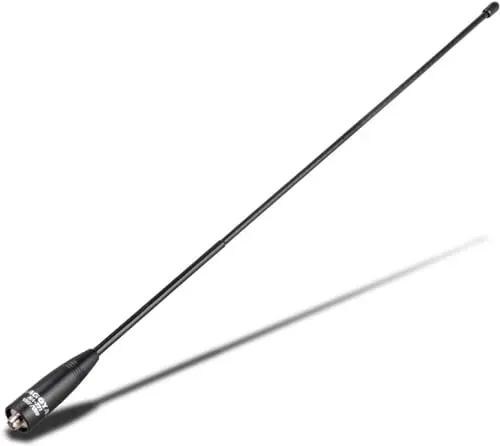
The standard upgrade is a Nagoya NA-771 at around $20.98. It is a 15.6-inch flexible whip with 2.15 dBi gain on the 2-meter band and 3.0 dBi on 70-centimeter. It screws straight onto Baofeng-style SMA-Female radios (the UV-5R, UV-82, TD-H3, AT-D878UVII Plus, and most other budget HTs).
If your radio has the opposite connector type (an SMA-Male jack, which Yaesu, TYT, and Wouxun handhelds tend to use), the equivalent is the Nagoya NA-771 SMA-Male. Look at your stock antenna before ordering. If the threaded part sticks out of the antenna (and screws into a hole on the radio), the radio has a Female jack and the antenna is Male. If the radio has a stud that sticks up (and the antenna has a hole), the radio is Male and you need an SMA-Male antenna. Buy the wrong one and it physically will not fit.
Installation is thirty seconds: unscrew the stock antenna, screw on the new one. Hand-tight only. Pliers will strip the threads.
Our best ham radio antennas roundup goes deeper on the alternatives if you want a shorter pocket-friendly whip or a longer folding tactical antenna for hiking. For a first repeater contact, the NA-771 is the safe default.
You can absolutely skip this step. The stock antenna is good enough to make a first contact in most metropolitan areas. Just know that when you eventually wonder "why can't I hit the repeater from inside my house?", the answer is almost always the antenna.
Step 7: Make Your First Contact
This is the part everyone is nervous about. I was nervous. Every ham I know was nervous. The good news: hams remember being new, and almost without exception they will be patient and friendly when you make your first call.
Pick a repeater you have heard activity on. Not a dead one. If you have been listening to N0XYZ 146.940 and you have heard two QSOs on it in the last twenty minutes, that is the one.
Wait for the repeater to go quiet. You do not interrupt an ongoing conversation. Wait for a clear pause where no one has transmitted for at least ten seconds.
Press PTT, wait half a second, then speak. This half-second matters. Some repeaters take a moment to come up after you key, and the first syllable of your first word can get clipped. Count "one" silently in your head after you press, then talk.
The first transmission is short. Identify with your call sign. Say "listening" or "monitoring." Like this:
"November zero alpha bravo charlie, listening." (release PTT)
That is it. You used the NATO phonetic alphabet for your call (one letter at a time, never "N0ABC" run together), you identified, and you signaled that you are open to a conversation without interrupting anything specific.
Wait fifteen to thirty seconds. Someone might respond. If they do, they will say something like:
"November zero alpha bravo charlie, this is Whiskey Alpha zero X-ray X-ray X-ray, good evening."
Respond:
"Good evening Whiskey Alpha zero X-ray X-ray X-ray, thanks for the come-back. My name is Jess, I am in Denver, running a Baofeng UV-5R on a Nagoya NA-771. This is my first contact on the radio. What is your setup?"
Then release PTT and listen. They will introduce themselves, tell you about their rig, possibly welcome you to the hobby, and either keep the conversation going or hand it back. From there it is just a conversation.
If no one responds after three or four tries on different repeaters at different times of day, that is normal. Radio activity has a rhythm. Weekday evenings around 6 to 8 pm local are usually busiest. Saturday mornings for nets. Tuesday at 2 pm, maybe nobody is listening to that repeater anywhere in your county. Try a different repeater, try a different time, and try again.
The FCC identification rule: you must identify with your call sign at the end of any transmission or conversation, and at least once every ten minutes during an extended conversation. CHIRP does not enforce this; you do. Make it a habit on the first contact and you will never forget.
Things that will not happen:
- You will not "break" the repeater. Repeaters are designed for thousands of users.
- Nobody will tell you to get off the air for being new. Hams know what new sounds like.
- Your audio is not as bad as you think. The radio's mic does most of the work.
Things that might happen:
- You forget your call sign halfway through a sentence. Everybody does. Pause, take a breath, finish the thought.
- You hold PTT for too long after your last word. The repeater's courtesy beep saves you; the other operator will know to wait.
- You key up at the same time as someone else (a "doubling"). You hear a buzzing tone in your headphones, you both release, and one of you tries again. No drama.
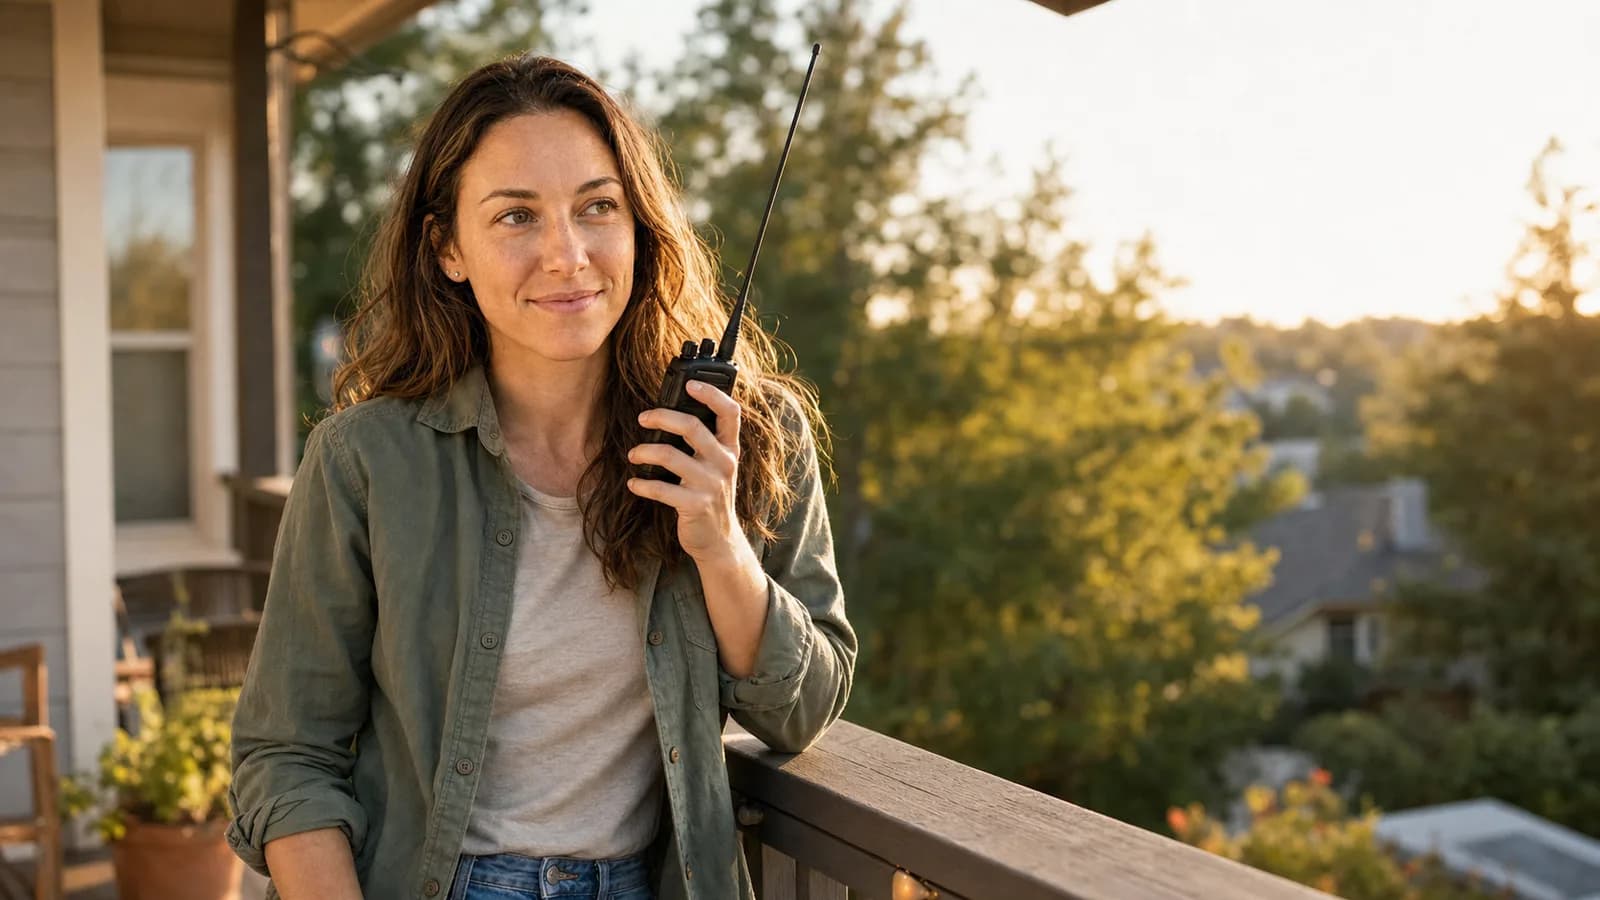
That is your first contact. Welcome on the air.
Step 8: Join a Local Net
A net is a scheduled on-air gathering on a specific repeater at a specific time. Most nets meet weekly or daily, often at 7 or 8 pm local on a club's primary repeater. They typically run for thirty minutes to an hour. There is a net control operator who runs the agenda, takes check-ins, and keeps order.
To find a local net: check your local ham club's website, RepeaterBook listings (some include net schedules), or just listen to the repeater you have been using at the same time on the same day each week. Patterns emerge quickly.
How to participate the first time:
- Listen, do not check in. First time on a net, just listen. You want to know the rhythm: how net control calls for check-ins, whether they want call sign only, call sign and name, or call sign, name, and location. Different clubs do it differently.
- The next week, check in. Wait for net control to call for check-ins ("calling for check-ins, please come now"). Key your PTT, give your call sign, and your name, and your location, in the format the net uses. Then release. Net control will acknowledge you, probably welcome you, and move on.
- You do not have to say more than that. Some nets do round-robin discussion; some do not. You are not obligated to participate in the topic of the week. Checking in counts.
Nets are where you meet your local ham community. Many are explicitly welcoming to new operators. Many clubs have an "elmer" (an experienced mentor) who actively looks for new check-ins to help. Within a month of regular net attendance you will know names, voices, and faces at the next club meeting.
Common First-Day Mistakes
Forgetting to identify with your call sign. The FCC requires you to identify at the end of every transmission session and every ten minutes during an extended one. Get it into the muscle memory on day one. Say your call at the start, say it at the end, and the rest takes care of itself.
Buying the wrong antenna connector. SMA-Female versus SMA-Male is not interchangeable. Look at your radio's connector before buying any antenna. Most budget Chinese handhelds (Baofeng, TIDRADIO, Radioddity) are SMA-Female. Most Yaesu and many TYT models are SMA-Male.
Cable issues mistaken for radio issues. "Error communicating with radio" is almost never the radio. It is the cable or the driver. Buy an FTDI cable from a known seller, and you will skip ninety percent of the troubleshooting.
Wrong CTCSS tone. If you hear the repeater but it does not respond to your calls, check the transmit tone in CHIRP. Repeaters use a tone to filter out interference, and your radio has to send the right one. RepeaterBook usually has the tone correct, but tones do change over time. Verify against the local club.
Charging anxiety. Modern lithium-ion packs do not need a full charge before first use. You do not need to "condition" the battery. Plug it in, give it a couple of hours, use it.
Talking too long on your first transmission. Keep first transmissions short. Identify, say what you mean, get out. You can have longer conversations once you are settled in.
Pressing PTT too softly. Some radios need a firm press; the PTT is intentionally stiff so you do not key up accidentally. Hold it down with a deliberate press, not a tap.
Not listening long enough before transmitting. Fifteen minutes minimum of listening on an active repeater before your first call. You will absorb more about etiquette in fifteen minutes than I can teach you in an article.
Featured Setup Picks
For a first ham radio setup, these are the three radios I recommend most often, plus the antenna upgrade. All are CHIRP-compatible (the TD-H3 has its own programming flow but the principle is the same), all are dual-band VHF/UHF, and all will get you on a local repeater on your first night.
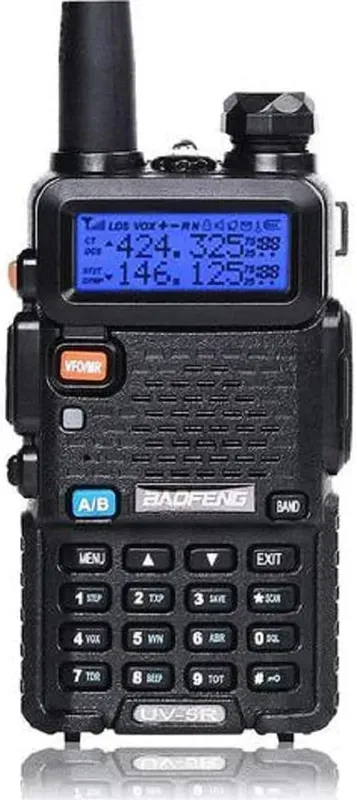
The default choice for "I want to learn ham radio without spending much." A score of 89 on our beginner-friendliness dimension is the highest in the catalog, mostly because the community around the UV-5R is enormous. Every problem you will hit has been answered ten thousand times on Reddit, YouTube, and the BaofengTech wiki. Our full Baofeng UV-5R review goes deeper on what it does and does not do.
Tradeoffs: build quality is fine, not great. The stock antenna is mediocre. The menu system is dense. You will probably outgrow it in a year, but you will learn a lot on it first.
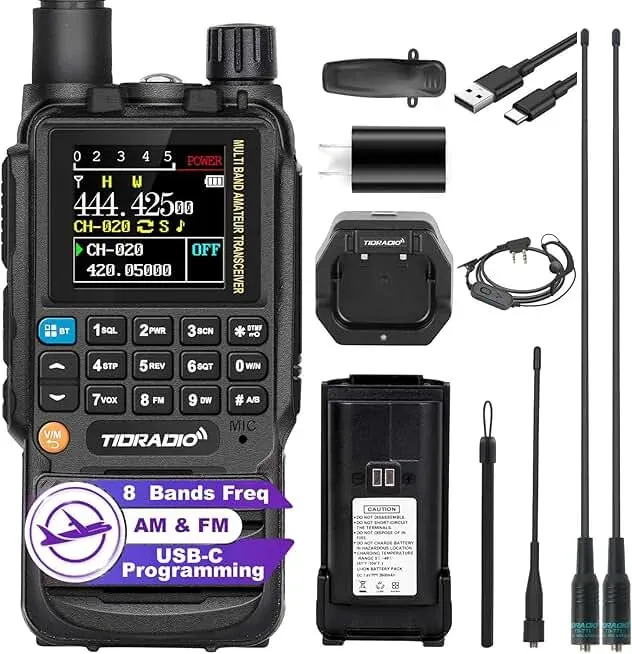
The modern alternative. USB-C charging instead of a proprietary barrel jack. Firmware that gets actual updates from TIDRADIO. A cleaner display. About double the price of a UV-5R but still solidly in the budget category. The full TIDRADIO TD-H3 review covers the gory details. If you hate the idea of plugging in a wall wart to charge and want something that feels more like a 2026 piece of consumer electronics, this is the one.
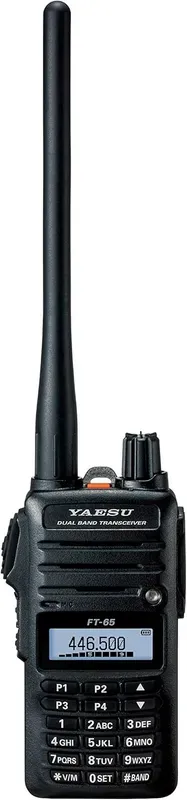
The name-brand step up. Japanese build quality, IP54 dust and water resistance, a much more legible display, and Yaesu's reputation for radios that last twenty years. Almost ten times the price of a UV-5R, and the score reflects the value tradeoff (its overall score is 55, not because it is a bad radio but because the price ceiling is unforgiving). If you know you are sticking with the hobby and you want something built well from the start, this is a reasonable splurge.
Troubleshooting
Radio will not power on. Battery seated correctly (the two clip points should fully engage)? Battery has charge (try a different known-good charge source)? Power button held long enough (some radios need a one-second press)?
Can't hear any repeater traffic. Volume up? Squelch level set sensibly (too high mutes everything; too low fills your headphones with static)? Correct channel selected? CHIRP file uploaded successfully (re-open the file and confirm the frequency matches RepeaterBook)? The repeater might be down for maintenance; try another one in your list.
Can transmit but no one responds. Are you sure your transmission is going out? Watch for the "TX" indicator on the display when you key up. If you see it, the radio is transmitting. Then it is probably just nobody listening at this hour, or the wrong tone, or the repeater is too far away.
Display shows weird characters. Most commonly a botched CHIRP upload. Re-download from radio, fix whatever was wrong, re-upload.
Cable shows up as a COM port but CHIRP cannot communicate. The cable's serial chip is probably a Prolific PL2303 clone. Replace it with an FTDI cable.
Audio sounds quiet on the repeater. Hold the radio so the mic is about three inches from your mouth. Speak across the mic, not directly into it. Do not block the mic hole with your fingers. Most "my audio is too quiet" complaints disappear with mic technique.
No one answers, ever. Three things to try, in order: a different repeater, a different time of day, and your local club's weekly net. The net is the highest-probability place to make a first contact, because nets are explicitly designed to acknowledge new check-ins.
If you are really stuck, just say so on a busy repeater: "November zero alpha bravo charlie, new operator, looking for a quick signal check." You will get help, often within thirty seconds. Hams help new hams. That is the culture.
What's Next
You made your first contact. You are an operator. Where do you go from here?
- Add more repeaters. Drive thirty miles in any direction and you will find different ones. Listening tells you which are active.
- Try a different mode. DMR opens up a worldwide digital network through hotspots and talkgroups. Your UV-5R cannot do it, but an AnyTone AT-D878UVII Plus can.
- Try operating outdoors. POTA (Parks on the Air) is the easiest entry into portable operating. Pack the radio, drive to a state park, and make a few contacts from the picnic table.
- Get the next license. General class opens HF (the long-distance bands) and is the natural next step. Our how to get your ham radio license guide covers the upgrade path.
- Join the club. Local clubs are where everything else happens: classes, technical help, public-service event volunteering, social meetups, and the eventual mentor relationship that will save you hundreds of hours.
The day you make your first contact is the day the hobby actually starts. Everything before this was studying for a test. Now you are on the air.