
Programming a Baofeng has a reputation it doesn't deserve. Half the forum threads on the subject read like the radio is a hostile mainframe from the 1970s. In reality, programming a UV-5R with CHIRP takes about fifteen minutes, and most of that is downloading the software and untangling the cable from the drawer.
The hard part isn't the programming. It's the cable. Specifically, buying a cable that actually works. Once you have one that talks to your computer, the rest is point-and-click.
This guide walks through the entire process on the Baofeng UV-5R, the radio most new Technicians program first. The same workflow works for the UV-82HP, UV-5R Plus, BF-F8HP, the K5 Plus, and most other CHIRP-supported Baofeng variants. If you have a different model, only the radio-selection step changes.
What You'll Need
Before you start, gather these. Most of the friction in programming a Baofeng comes from missing one of these items or having a low-quality version of it.
A CHIRP-compatible Baofeng radio. The UV-5R, UV-5R Plus, UV-82, UV-82HP, BF-F8HP, K5 Plus, GT-5R, and the 5RM are all fully supported. The newer DMR models (DM-32, BF-5RH PRO) have partial CHIRP support but are usually programmed with manufacturer CPS instead. If you're not sure whether your specific Baofeng is supported, check the CHIRP supported radios wiki before going further.
A USB programming cable. This is the make-or-break component. Buy a cable with a genuine FTDI or Silicon Labs CP210x chip. Avoid cheap cables with cloned Prolific PL2303 chips, because Windows will reject them and you'll spend an evening wondering why CHIRP can't see your radio. Expect to pay $15 to $25 for a reliable cable. The bundled cable in some Baofeng kits is fine; the $4 mystery cable on Amazon is not.
A computer. CHIRP runs on Windows 10 or later, macOS, and Linux. Any laptop from the last decade has enough horsepower. You'll need one free USB-A port. If your laptop only has USB-C, get a powered USB-C-to-A adapter, not a passive hub.
CHIRP software. Free, open source, downloaded directly from chirpmyradio.com. There's no paid version and no upgrade path. The latest CHIRP-next build is what you want.
A frequency list. You can hand-enter channels, but most people import them from RepeaterBook. Have the site bookmarked. If you're brand new and don't know what to program, start with your local 2-meter and 70-centimeter repeaters and your area's simplex calling frequencies.
About fifteen minutes. Not fifteen hours. Not fifteen days. Fifteen minutes.
Step 1: Download and Install CHIRP
Go to chirpmyradio.com/projects/chirp/wiki/Download and grab the latest build. CHIRP is versioned by build date, something like chirp-20260415 for an April 2026 build. Take the latest stable release, not a daily or experimental build.
On Windows, run the installer. It's a normal Windows setup wizard: next, next, install. The installer drops a CHIRP icon in your Start menu.
On macOS, download the .dmg file, open it, and drag CHIRP into your Applications folder. The first time you launch it, macOS will probably refuse to open it because it isn't signed by an Apple-recognized developer. Right-click the app, choose Open, then confirm in the dialog. After that, double-clicking works normally.
On Linux, CHIRP is usually in your distribution's repositories under chirp or chirp-daily. If not, the Python pip install option works on most modern distros. Launch from the command line with chirpw or from your application menu.
Launch CHIRP once to confirm it opens. You'll see an empty window with a File menu and a Radio menu. That's CHIRP at rest, waiting for a radio to talk to. If it crashes on launch, you probably need to install Microsoft Visual C++ Redistributable (Windows) or update your Python install (Linux). Most users won't hit either issue.
Step 2: Connect Your Radio to the Computer

Turn the radio off before you plug anything in. This isn't strictly required for every model, but it's a habit that prevents weirdness on the variants that don't like hot-plugging.
Plug the two-pin Kenwood-style connector into the speaker-mic port on the side of the Baofeng. There's a rubber cover that flips open, and the two pins on the cable line up with the two holes underneath. The connector goes in one way. If it feels wrong, flip it. Push until it's flush. The radio's speaker-mic jack is the one with two holes; do not plug into the antenna connector or the charging contacts on the back.
Plug the USB end into your computer. On Windows, wait ten to thirty seconds. The first time you connect a given cable, Windows installs drivers automatically. You'll see notifications about device installation. On macOS and Linux, the cable just shows up as a serial device with no fanfare.
Turn the radio back on. The display should look normal; programming mode doesn't kick in until CHIRP requests it.
To verify the connection on Windows, open Device Manager and look under "Ports (COM & LPT)." You should see something like "USB Serial Port (COM3)" or "Silicon Labs CP210x USB to UART Bridge (COM4)." Note the COM number; you'll need it.
On macOS, open Terminal and run ls /dev/tty.usbserial* or ls /dev/tty.SLAB*. You should see at least one entry.
On Linux, run ls /dev/ttyUSB*. Same idea.
If nothing shows up, the cable isn't being recognized. Skip down to the troubleshooting section before going further. Connecting the cable is the step where 90 percent of people get stuck.
Step 3: Read the Radio's Memory into CHIRP
In CHIRP, go to Radio → Download From Radio. A dialog opens asking for three things: the serial port, the radio's manufacturer, and the radio's model.
Pick the COM port (Windows) or /dev/ device (Mac, Linux) that matched your cable in the previous step.
Set the manufacturer to Baofeng.
Set the model to your exact radio. This matters more than people realize. UV-5R, UV-5R V2+, UV-5RTP, BF-F8HP, and UV-5X are all listed separately and they are not interchangeable. The "BF-F8HP" entry is for the BF-F8HP; selecting "UV-5R" for a BF-F8HP will appear to work but produces flaky uploads. If you're unsure which variant you own, check the sticker on the back of the radio under the battery.
Click OK. CHIRP starts reading the radio's memory. You'll see a progress bar in CHIRP, and the radio's display will show "USB" or a flashing transmit icon. This is normal. The read takes one to two minutes on a UV-5R. Do not unplug the cable or touch the radio's keys during the read.
When the read completes, CHIRP shows your radio's current memory as a spreadsheet. Each row is a channel slot, numbered from 1. The columns include channel name, frequency, tone mode, CTCSS tone, duplex direction, offset, transmit power, and mode.
If your radio is fresh out of the box, most rows will be empty. If you've used it before or programmed manually, you'll see whatever's in there.
Before doing anything else, save the file. File → Save As, give it a name like UV5R_backup_2026-05-22.img, and put it somewhere you can find it. This is your insurance policy. If you mess up the next steps, you can restore from this file.
If you get "Error communicating with radio" or "Clone failed" at this stage, the cable or the model selection is wrong. Don't keep trying without changing something; skip to the troubleshooting section.
Step 4: Add Repeater and Simplex Frequencies
You have three ways to fill the channel table. The first one is the easiest, and it's the reason most people install CHIRP.
Option A: Import from RepeaterBook (Recommended)
In CHIRP, go to Radio → Import From Data Source → RepeaterBook → RepeaterBook Proximity Query. A dialog opens asking for your location and a search radius.
Enter your ZIP code. Set the radius to twenty-five or fifty miles. Choose the bands you want (2m and 70cm for most ham use). Choose the modes (FM analog covers everything you need on a UV-5R).
Click OK. CHIRP queries RepeaterBook and returns a list of repeaters within your radius. Each entry includes the input frequency, output frequency, offset, CTCSS tone if any, callsign, and location.
Select the repeaters you want to import. Hold Ctrl (or Cmd on Mac) and click to multi-select, or use Shift-click to select a range. Don't import every repeater that comes back; pick the ones in your immediate area plus a few in directions you might travel. Twenty repeaters is plenty for a starter list.
Click Import. CHIRP drops them into your channel table with everything filled in: frequency, offset direction, CTCSS tone, channel name. The frequencies are correct. The tones are current as of when RepeaterBook last verified them, which is usually within the past month.
This is the workflow that turned programming from a multi-evening project into a five-minute task.
Option B: Manual Entry
If RepeaterBook doesn't have what you need or you want to add a single simplex frequency, you can type entries directly into the spreadsheet.
For a simplex channel, you need three things: a name, the frequency in MHz, and the mode (FM for analog ham). Click the row you want, type the name in the Name column, type the frequency in the Frequency column (something like 146.520), and confirm the mode is FM. Set Duplex to "(none)" or simplex. Leave the tone fields alone unless your simplex group uses a tone.
For a repeater, you need the input frequency, the output frequency, and any CTCSS tone. The repeater's output frequency goes in the Frequency column (this is what your radio receives). The Duplex column gets a + or - depending on the offset direction. The Offset column gets the offset value: 0.600000 for a standard 2-meter repeater (600 kHz), 5.000000 for a standard 70cm repeater (5 MHz).
If the repeater requires a CTCSS tone, set Tone Mode to "Tone" and put the tone frequency in the Tone column (88.5, 110.9, 123.0, and so on). If it requires a tone to also receive (rare), use "TSQL" instead.
This is where the RepeaterBook import looks especially good in retrospect. CHIRP does this math for you.
Option C: Hybrid
The pragmatic workflow is to import from RepeaterBook, then clean up. Delete repeaters you'll never use, rename channels to something readable ("Denver-North 146.94 +600 88.5") instead of the autogenerated names, and reorder so your most-used channels are at the top of the list. Drag rows up and down to reorder.
While you're cleaning up, leave room for simplex channels. The 2-meter calling frequency (146.520), 70cm calling frequency (446.000), the GMRS simplex channels (if you also have a GMRS license), and your local club's simplex frequencies are all worth slots near the top.
Understanding Key Programming Concepts
If you're new to ham radio, some of the CHIRP columns will look like alphabet soup. A quick tour of the important ones:
Simplex vs. Repeater. A simplex channel uses the same frequency to transmit and receive. A repeater channel uses one frequency to transmit (to the repeater) and a different frequency to receive (from the repeater). The repeater listens on one frequency and rebroadcasts on another, typically with much more power than your handheld. That's how you can hit a repeater forty miles away with a 5-watt radio. The difference between the two frequencies is the offset.
Offset and Duplex. "Duplex" is the direction of the offset: plus (you transmit higher than you receive) or minus (you transmit lower). "Offset" is how much. For 2-meter repeaters in North America, the offset is almost always 600 kHz with the direction determined by the receive frequency. For 70-centimeter repeaters, the offset is almost always 5 MHz. CHIRP fills these in automatically when you import from RepeaterBook.
CTCSS Tones. Continuous Tone-Coded Squelch System is a sub-audible tone you transmit alongside your voice to tell the repeater it should rebroadcast. Most repeaters require a specific tone to "open" them; if you transmit without the tone, the repeater ignores you. Common tones are 88.5, 100.0, 103.5, 110.9, 123.0, and 141.3 Hz. Each repeater has its own. The RepeaterBook entries include the tone. If your handheld can hear a repeater but the repeater isn't repeating you, an incorrect tone is the first thing to check.
Power Levels. The UV-5R has high (5 W on most variants, 8 W on the BF-F8HP and UV-82HP) and low (1 W). Use low power on simplex with someone close by to save battery. Use high power on repeaters or when you need the range.
Wide vs. Narrow. FM bandwidth. Wide (25 kHz) is the standard for most ham 2m and 70cm repeaters. Narrow (12.5 kHz) is used on some commercial bands and a few ham repeaters. Match what the repeater uses; RepeaterBook tells you.
Mode. FM is what you want for analog ham repeaters and simplex. AM appears for the aviation band on RX-only. NFM is the narrow variant.
Once you've programmed twenty channels with RepeaterBook, the columns stop looking strange. You're filling out a spreadsheet, not configuring a router.
Step 5: Upload to the Radio and Test
With your channel table looking right, go to Radio → Upload To Radio. CHIRP asks you to confirm the radio model and serial port (it should remember from the download). Click OK.
CHIRP writes the modified memory block back to the radio. The progress bar runs through, the radio shows "USB" or the programming indicator, and after a minute or two the write completes. Don't unplug or power-cycle until the bar finishes.
When the upload is done, power-cycle the radio. Turn it off, count to three, turn it back on. The radio reboots into the new programming.
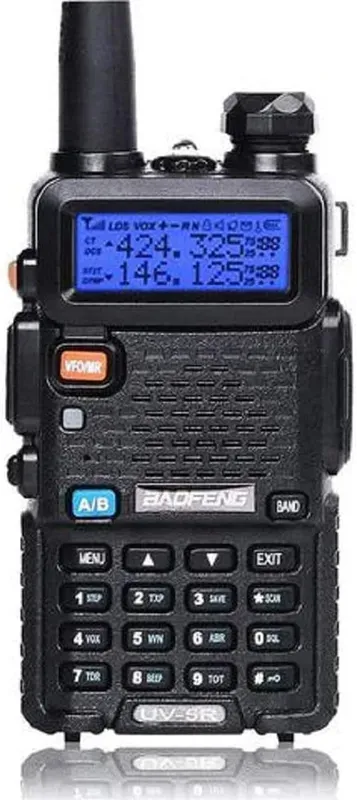
Rotate the channel knob (the inner ring on the dual knobs on top) to the first channel you programmed. The display should show the channel name and frequency. Listen for activity. Even on a quiet weekend, a popular repeater will have something every few minutes.
Before you transmit, double-check the frequency on the display matches what you intended. The radio's display is the source of truth, not what you typed in CHIRP. If the display shows 146.940 and you meant to program 146.940, you're good. If it shows something different, you've found a programming error worth tracking down before you key up.
When you do transmit for the first time, do it on simplex first if you can. Find another ham, agree to a frequency, key up briefly, and listen for them to come back. If your radio sends and receives correctly on simplex, the radio-side hardware is working. From there, repeater testing is just a matter of matching the right tone and offset.
If a programmed repeater doesn't repeat you, the most common causes (in order) are wrong CTCSS tone, wrong offset direction, and being out of range. Verify the tone on RepeaterBook, verify the offset polarity matches your geographic relationship to the repeater, and try a closer repeater.
Troubleshooting Common Problems
Most CHIRP issues fall into a small number of categories. Work through them in order.
Cable not detected at all. No COM port appears, no /dev/tty* entry. This is a driver problem 99 percent of the time. On Windows, look in Device Manager for a yellow warning under "Other devices" or a generic "USB Serial Controller" with no driver. Right-click and update the driver, or download the FTDI or Silicon Labs driver directly from the manufacturer. If you're using a cheap Prolific cable, the cloned chip may be rejected outright by current Prolific drivers. Replace the cable with an FTDI-based one. There is no software fix for a counterfeit chip.
CHIRP shows "Error communicating with radio" during download. The cable is detected but CHIRP can't talk to the radio. Causes, in order of likelihood: wrong COM port selected (try the others), wrong radio model selected (verify against the sticker on the back of the radio), cable not fully seated (push harder), radio off or in a strange mode (turn off and on, then retry). If you're connecting through a USB hub, plug directly into the computer instead.
Upload completes but channels don't work. First, did you save and re-read the radio to verify what CHIRP wrote? Do that. If CHIRP's view of the radio's memory now matches what you programmed, the radio itself is doing what you told it. If the repeater is silent: wrong tone, wrong offset direction, or the repeater is offline. If simplex is silent: nobody's calling on that frequency, or you have squelch set too high.
Radio shows the wrong frequency. Could be a typo in the CHIRP table, could be the wrong frequency in RepeaterBook. Re-check both. Could also be that you uploaded a UV-5R image to a UV-5R V2+ or vice versa; the variants store memory slightly differently and the wrong driver writes to the wrong addresses.
Memory full. The UV-5R holds 128 channels. The UV-5R Plus, K5 Plus, UV-82, and BF-F8HP also top out at 128. The 5RM, 5RM Pro, UV-5R Mini, and most newer variants hold 999. If CHIRP refuses to upload, you may have exceeded the radio's slot count. Delete channels you don't use.
CHIRP crashes during read or write. Update to the latest CHIRP-next build. Close other applications that use USB-serial connections (some IDEs, some flashing tools). Try a different USB port. If it crashes consistently, file a bug report on the CHIRP issue tracker; the developers usually triage them within a few days.
Best Practices
A few habits that pay off over time.
Keep a backup. Save your CHIRP file every time you change channels. Name it with the date. Drop a copy in cloud storage. When (not if) you reset your radio or buy a second one, you can re-flash the same channel plan in two minutes.
Name channels descriptively. "Denver-N 146.94 +600 88.5T" tells you what you're tuned to. "REPEATER1" doesn't. The Baofeng's display can show seven characters; use them.
Organize by use. Put your most-used local repeaters at the top (channels 1 through 10). Then simplex calling frequencies. Then out-of-town repeaters you might want on a road trip. Then emergency frequencies (NOAA weather, ARES nets). The Baofeng's channel knob makes scrolling tedious, so keep what you use close.
Update quarterly. Repeaters change tones, go offline, or move frequencies. Re-pull from RepeaterBook every few months to catch the changes.
Don't transmit on what you can't legally use. The UV-5R can transmit on a lot of frequencies, including many you're not licensed to use. Your Technician license covers 2m and 70cm ham (and a few HF segments). Public safety frequencies, business frequencies, and FRS/GMRS without a separate license are off-limits. Program receive-only entries for those if you want to monitor them, and lock yourself out of transmitting by setting them as RX-only in CHIRP. For more on legal use, see our Baofeng UV-5R legal guide.
Next Steps
Programming the radio is half the battle. The other half is using it. Find your local repeater's net schedule (most run a weekly check-in net), join the net, and announce yourself. Most local nets are friendly to new hams checking in for the first time.
If you haven't got your Technician license yet, our ham radio license guide covers the exam, the cost, and the timeline. If you're still shopping for a radio, our Baofeng UV-5R review and best Baofengs guide compare the lineup. For broader newcomer context, the best ham radios for beginners roundup covers the under-$50 segment in detail, and our CHIRP explainer goes deeper on what the software does and why it exists.
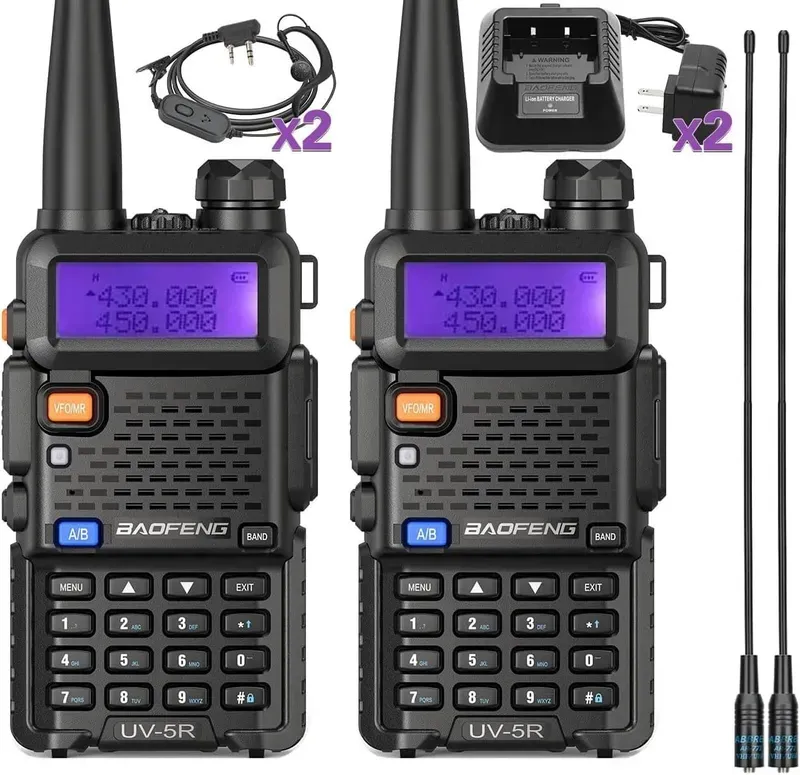
The UV-5R is the radio this guide is built around. At $16, it's the cheapest way to get on the air, and it remains the most CHIRP-programmed radio in amateur service.

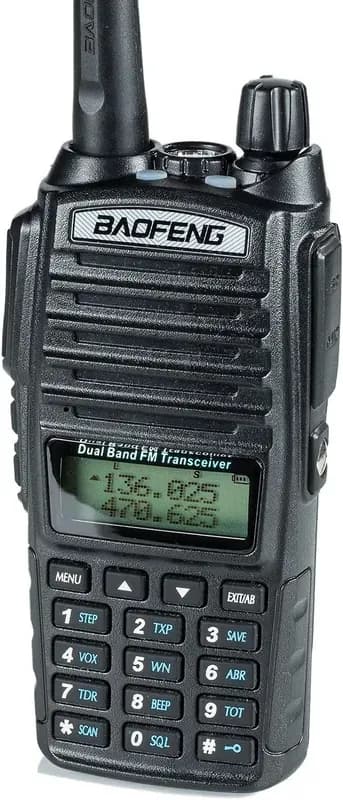
The UV-82HP is the dual-PTT variant of the UV-5R lineage. Same CHIRP workflow, slightly bigger chassis, an extra PTT button for two-channel use. If you want one radio for a club channel and a backup channel, it earns its $50.
The UV-5R Plus is the modern UV-5R refresh. Same memory layout in CHIRP, slightly better receiver, fresh firmware. It's worth the $20 premium over the base UV-5R if you're starting from scratch.
